Test & Inspection
Advancements in Hardness Testing: Heatmapping and the Power of AI-Indentation Evaluation in the Metals Industry
An exciting addition to hardness testing is the integration of AI-based indentation evaluation, which enhances the precision and efficiency of hardness mapping.

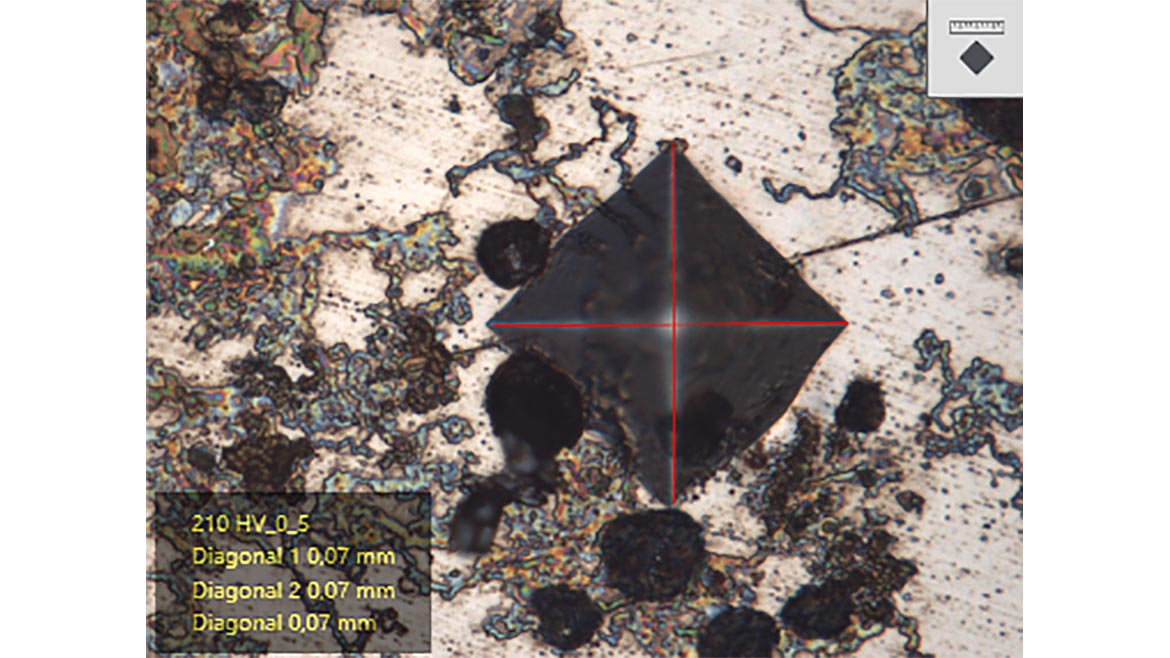
AI Evaluation for Brinell Testing with EMCO-TEST DuraVision. Image Source: ZwickRoell
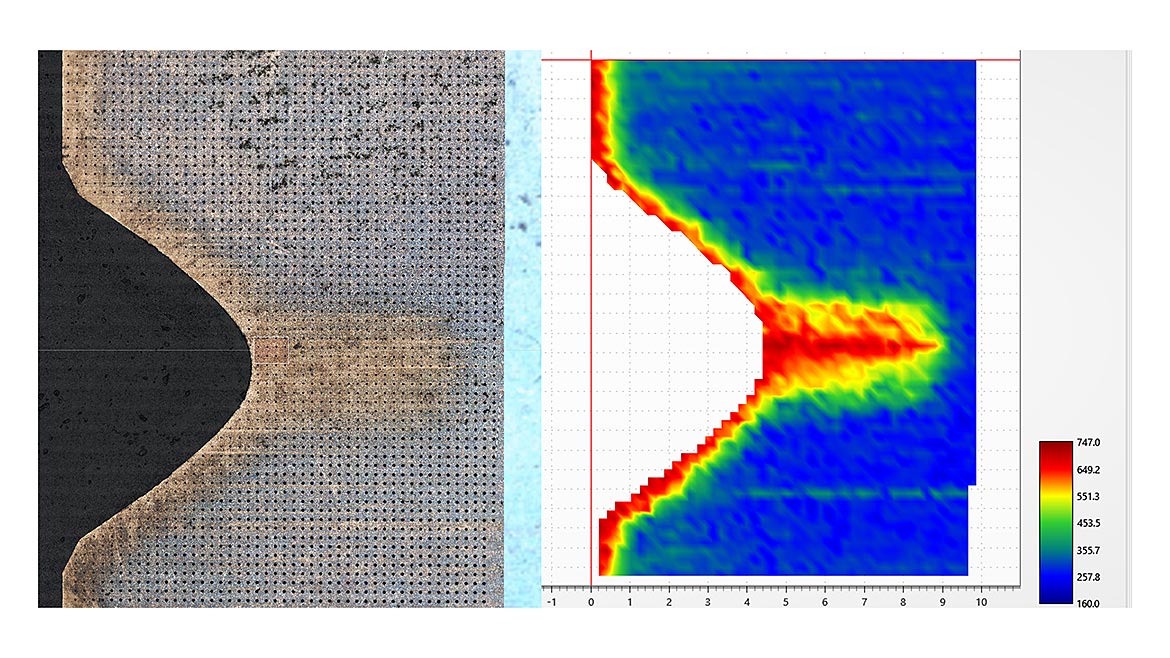
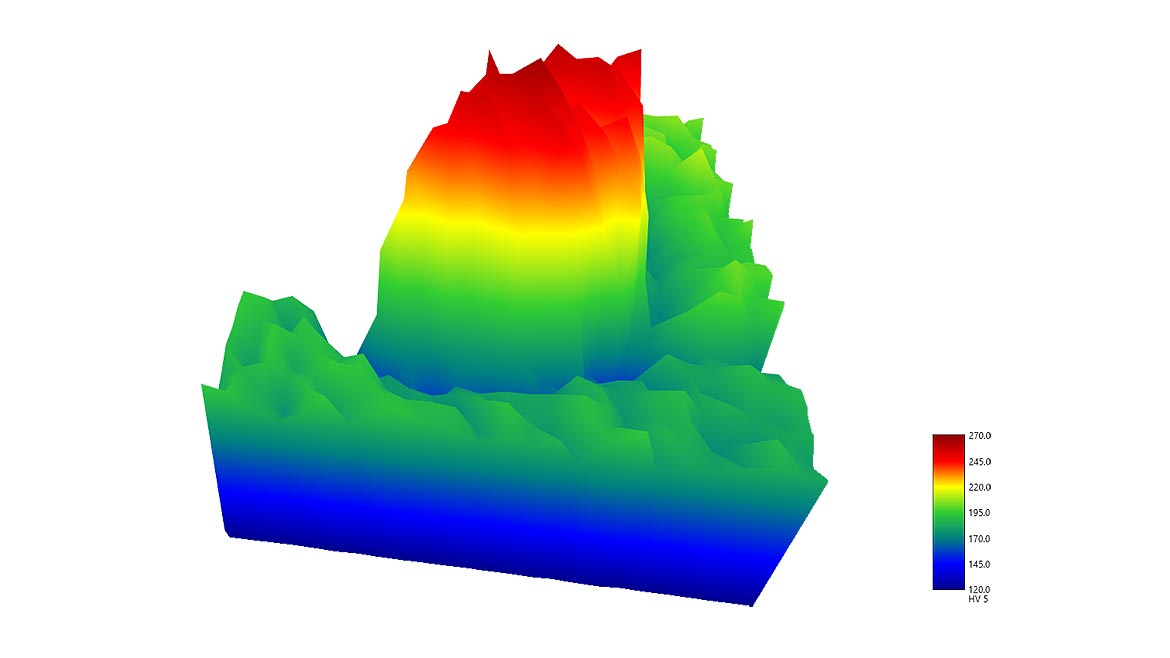
In the ever-evolving field of material sciences, hardness testing is an essential technique for evaluating a metal’s quality—a critical characteristic for industries that rely on durable materials. Traditionally, corresponding applications involved single-point measurements, series measurements, or applications such as CHD measurement, but advances in technology have given rise to hardness mapping, a sophisticated approach that uses thousands of indentations across the sample. The result is a heat map that precisely indicates the areas, or zones, of the sample that are harder or softer. This modern approach has reached the quality control sector in industries such as research institutions, automotive, aerospace, and manufacturing, offering a detailed profile of material properties.
An exciting addition to hardness testing is the integration of AI-based indentation evaluation, which enhances the precision and efficiency of hardness mapping. With AI, machines can now analyze hardness data with improved accuracy, detect exactly the tips of an indentation that might have been incorrect when using traditional automatic contrast detection.
This article explores industrial applications of hardness mapping and AI-enhanced evaluation, covering methods, sample preparation, advantages, limitations, and the future of AI-driven testing technologies in the modern industry.
Industrial Use Cases for Hardness Mapping
Hardness mapping has found widespread applications in industries where precise material performance is crucial.
Aerospace: This industry battles between lightweight construction and maximum durability. Aircraft components like turbine blades and landing gear are subject to extreme stresses and temperatures. In addition to a variety of quality tests, hardness mappings help engineers confirm that these critical parts meet strict safety standards.
Automotive: In the automotive industry, engine components and transmission systems require high strength and wear resistance. Hardness maps of these parts reveal any inconsistencies, such as hardness variations due to heat treatment errors, which could compromise performance.
Manufacturing and Metal Fabrication: Heat treated metals as well as weld seams show different zones with softer and harder areas. With the help of hardness mapping, weak points in the production process can be made visible.

Methods for Hardness Mapping
Vickers Hardness Mapping: The Vickers test, known for its high accuracy, uses a diamond pyramid indenter to measure hardness across a grid pattern. It is often used for harder materials and is suitable for detecting small variations in metals. Depending on the sample to be tested, different loads can be used for the Vickers method. The lower the load, the more difficult it is to optically evaluate the indentations. The higher the load, the less clear the individual hardness zones become in the result.

Nanoindentation Mapping: For ultra-precise measurements, especially in materials research, nanoindentation supports microscopic hardness mapping. This technique is essential for developing advanced materials with complex microstructures, like composites and nanomaterials.
Sample Preparation and Testing Procedures
For accurate hardness mapping, meticulous sample preparation is key. Samples must be clean, polished, and free from contaminants to ensure consistent measurements. Common steps include:
Cutting and Mounting: Samples are often sectioned from a larger piece to facilitate analysis. Small samples may be mounted in resin to secure them during testing. During these processes, care must be taken to ensure that the samples are heated as little as possible. Any effect of heat can change the hardness value.
Polishing: The surface must be polished to a mirror-like finish, removing any scratches or irregularities. This is especially important for nanoindentation mapping, where even minor surface defects can skew results. The better the surface is prepared, the lower the test load can be.
Plane Parallelism: It must be ensured that the sample is placed as parallel as possible on the test table, which in turn allows the indenter to be positioned at a perfect 90° angle to the sample. Specimen holders for mounted samples provide assistance by clamping the sample, ensuring it is aligned horizontally on the test table.
.jpg)
Test Point Patterns: Modern hardness tester equipment can automate up to ten thousand indentations in a grid pattern, providing a comprehensive hardness profile across the sample’s surface, regardless of the complexity of the sample shapes.
AI-Based Indentation Evaluation: Traditionally, automatic contrast detection was used to evaluate indentations, but this method had limitations. Surface scratches or marks often led to errors, and low-contrast impressions at high magnifications—such as those made with 100x lenses—could be difficult to interpret with accuracy. AI-based indentation evaluation addresses these challenges by using machine learning models trained on a wide variety of indentation types and conditions. This AI system can accurately evaluate indentations even in challenging conditions, making it possible to interpret high-quality hardness data despite potential surface imperfections.

Advantages of Hardness Mapping Over Conventional Testing
Hardness mapping has several advantages over traditional, single-point hardness testing or series measurements:
In-Depth Material Insights: A single-point test provides only one measurement, but mapping offers a comprehensive view of hardness variations across the entire sample, uncovering subtle differences in composition or treatment.
Defect Detection: Hardness maps can reveal defects, like voids or inclusions, that are not visible through visual inspection or single-point testing. This capability is particularly beneficial in industries where material integrity is paramount.
Quality Control and Process Verification: Mapping allows for more robust quality control by verifying that production processes, such as heat treatment or surface hardening, have been consistently applied. For example, in manufacturing gears, hardness mapping can verify that the carburized layer has achieved the desired depth and uniformity.
Failure Analysis: When a component fails unexpectedly, hardness mapping can identify regions of weakness or hard-to-detect microstructural inconsistencies, assisting engineers in pinpointing the failure’s root cause.
Limitations and Challenges of Hardness Mapping
While hardness mapping is beneficial, there are several challenges and limitations to its widespread adoption:
Cost of Equipment: Hardness mapping machines are expensive, and the investment may not be feasible for smaller manufacturers or laboratories. Moreover, ongoing maintenance and calibration are essential to ensure accuracy, adding to the operational costs.
Time-Intensive: Mapping an entire surface can be time-consuming, especially for larger samples. Although automation has improved, achieving high-resolution maps for extensive surfaces may still take hours.
To optimize time and resources, many companies conduct standard series or individual measurements during regular working hours and reserve hardness mapping for overnight applications. Companies can fully automate the mapping process without impacting daytime productivity. This approach allows the machine to operate continuously, ensuring efficient use of equipment and maximizing data collection without sacrificing valuable operational time.
Sample Preparation Demands: For accurate hardness mapping, sample preparation is meticulous and requires skilled operators. Improper preparation can result in inaccurate readings, potentially leading to flawed conclusions about the material’s properties.
Interpretation Complexity: The wealth of data generated by hardness mapping can be challenging to interpret. Understanding the significance of hardness variations requires expertise in metallurgy and materials science, as well as advanced data analysis techniques.
Advantages of Hardness Mapping in Modern Industry
Despite these challenges, hardness mapping has proven to be invaluable in industrial settings. Here’s how it supports progress in material science and quality assurance:
Enhanced Safety: With more detailed insights into material properties, industries like aerospace and automotive can better ensure the safety and reliability of their components, protecting both users and the public.
Material and Process Optimization: By identifying areas where a material’s hardness deviates from the norm, manufacturers can refine their production processes to produce more consistent and durable materials.
Innovation in Material Design: Hardness mapping is crucial for developing new materials, especially in research settings. Scientists can analyze how microstructural changes impact hardness and fine-tune compositions to create metals that meet specific performance needs
Future Outlook: Integrating Hardness Mapping with Digital Solutions
As industry trends continue to move toward automation and digitalization, hardness mapping is set to become even more powerful with AI-based evaluation. By creating a digital replica of a component based on hardness mapping data, engineers can simulate performance under various conditions, identifying potential failure points and predicting material behavior over time.
The use of AI for evaluating indentations is also set to revolutionize the accuracy and efficiency of hardness mapping. With AI-based indentation evaluation, machines can analyze test point patterns with exceptional precision, overcoming challenges associated with surface imperfections and low-contrast indentations. This automated analysis accelerates the testing process and ensures that critical material insights are not missed.
Looking for a reprint of this article?
From high-res PDFs to custom plaques, order your copy today!


