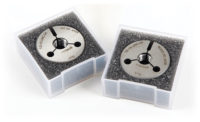
Gages for Screw Thread Inserts (STI)
It is critical for both the gage manufacturer and the metrology lab to know the industry standard for the gages being manufactured or calibrated.

Screw thread inserts (STI) require the threaded hole to be inspected prior to inserting the threaded insert or coil. The dimensions and tolerances for the gages used to inspect these threads have been a bit confusing over the past 30 years. This confusion has affected metrology labs, gage manufacturers, and gage end users. The problems revolved around the tolerance for the gage pitch diameters and the calculation of the No-Go gage major diameters. A quick review of the history of the applicable industry standards will help to explain the issues.
Previously, the Mil-T-21309E standard from 1975 was used to define the gages for STI threads. Per paragraph 3.3, “The gages shall be ground and lapped and conform to Handbook H28, except the pitch diameter and major diameter. The pitch and major diameter shall conform to table III for 3B class of thread fit and table IV for the 2B class of thread fit.” Each gage shall be marked “STI” or “Screw Thread Insert.” The problems occur when viewing the previously mentioned tables and the tolerances stated within. The “Note” on both Table III and IV states, “Thread plug gages above heavy line are class “W” gages and thread plug gages below the heavy line are class “X” gages (see Handbook H28). This is where things get interesting.
For many years, gage manufacturers have offered both class “X” and “W” tolerance thread plug gages, as options for STI thread gages. At some point, the class “X” tolerance became the standard, regardless of size. Class “W” was available, but was considered a special or make item. This practice created some confusion for the gage user and the supporting metrology labs on the “W” tolerance sizes above the solid line on tables III and IV from Mil-T-21309E. In 1992, the Mil-T-21309E was canceled. It was stated that future requests for this item should refer to A-A-59158. This standard only has references to NSN numbers for some of the gages. The aerospace industry created SAE AS59158 in 2007 to address STI threads in their industry. SAE AS59158, Tables 2 and 3 within this standard follow the same “W” tolerance above the line in both tables as the Mil-T-21309E. The reference standard for other features was updated to ASME B1.2.
In 1993, the ASME B18.29.1 “Helical Coil Screw Thread Inserts – Free Running and Screw Locking (Inch Series)” standard was approved. Under the paragraph 2.2 Gages and Gaging, “Acceptance of the threaded hole is determined by gaging with STI GO, NOTGO (HI), and plain cylindrical gages designed and applied with System 21 of ASME B1.3 (see Non-mandatory Appendix C).” Appendix C states the gages are held to a class X tolerance per ASME B1.2. The ASME B18.29.1 standard more closely represents what much of the gage industry was already supplying as a standard, class “X” tolerance gages. This appendix also helps with the calculation of the No-Go major diameter for the thread plug gage by referring to the ASME B1.2 for all other gage dimensions.
| Go Member | Nogo Member | |
| Major Diameter | .31500 + .00050 | .30680 - .00050 |
| Pitch Diameter | .28250 + .00030 | .28510 - .00030 |
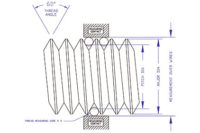
| Measurement over Wires | .32580 + .00030 | .32840 - .00030 |
| Wires Used | .02887 (20p 60°) | .02887 (20p 60°) |
| Helix Angle | 3º13' RH 30°±15' | |
| Lead Length | .05000 w/in .00030 | |
| Basic Thread Length | 1/2 | 5/16 |
It is important to note, although the ASME B18.29.1 refers to the ASME B1.2 and class “X” tolerances for the gages, it is a non-mandatory appendix only. It is not part of the standard. It is supplied as a reference and for guidance.
A quick look at ASME B1.2, paragraph 3.5 Standard Thread Gage Tolerances,
“(a) W tolerance, shown in Table 7, represent the highest commercial grade of accuracy and workmanship and are used for thread-setting gages.
(b) X Tolerances, shown in Table 6, are larger than W tolerances and are used for product inspection gages.
Unless otherwise specified, all thread gages and gaging contacts which directly check the product thread shall be X tolerance.”
The variation between class “X” and “W” tolerance threads is not only at the pitch diameter or the major diameter. The ASME B1.2, Tables 6 and 7 list “X” and “W” including the following attributes: Lead, Half Angle, Major Diameter, and Pitch Diameter. “W” tolerance is at least half or more (tighter) than the class “X” tolerance. (See the figures 1-3 specification sheet examples of the “X” vs. “W” STI gages.)
| Go Member | Nogo Member | |
| Major Diameter | .31500 + .00050 | .29570 - .00050 |
| Pitch Diameter | .28250 + .00030 | .28510 - .00030 |
| Measurement over Wires | .32580 + .00030 | .32840 - .00030 |
| Wires Used | .02887 (20p 60°) | .02887 (20p 60°) |
| Helix Angle | 3º13' RH 30°±15' | |
| Lead Length | .05000 w/in .00030 | |
| Basic Thread Length | 1/2 | 5/16 |
For the gage user, it is important to note that it is highly unlikely that you will be able to feel the difference between a thread plug gage with a class “X” tolerance versus a class “W” tolerance during the inspection of your threaded parts. The No-Go (HI) major diameter, regardless of standard, will not touch your product major diameter. By design, the No-Go (HI) plug gage only inspects the maximum pitch diameter. All other dimensions are cleared. The No-Go (HI) gage major diameter is required to be smaller than the Go major diameter. Both of these variations have a significant effect on the gage manufacturer and metrology lab.
It is critical for both the gage manufacturer and the metrology lab to know the industry standard for the gages being manufactured or calibrated. If the standard is not specified, both will default to what they have established as a standard. The manufacturer may default to ASME B18.29.1 and make the gages to a Class X tolerance. The No-Go major diameter and gage tolerances will be calculated per ASME B1.2. ASME B1.2 will generate a larger No-Go major than the Mil-T-21309E. When the metrology lab is sent the gage and only has the Mil-T-21309E, they will fail the No-Go gage for being oversize on the No-Go major. They may also fail the gages for not meeting the Class W tolerance on the pitch diameter.
| Go Member | Nogo Member | |
| Major Diameter | .31500 + .00050 | .29570 - .00050 |
| Pitch Diameter | .28250 + .00010 | .28510 - .00010 |
| Measurement over Wires | .32580 + .00010 | .32840 - .00010 |
| Wires Used | .02887 (20p 60°) | .02887 (20p 60°) |
| Helix Angle | 3º13' RH 30°±8' | |
| Lead Length | .05000 w/in .00015 | |
| Basic Thread Length | 1/2 | 5/16 |
Figure 1 shows the calculated gage dimensions and tolerances per the ASME B18.29.1 for the pitch diameters and ASME B1.2 for all other dimensions and Class X tolerances.
Figure 2 is an example of the Mil-T-21309E dimensions with the tolerance increased to a Class X. Figure 2 is what was supplied as a standard gage for many years prior to the introduction of ASME B18.29.1.
Figure 3 shows the gage dimensions and tolerances completely per Mil-T-21309E with the W tolerance per the standard.
As you can see, there are distinct differences in either dimensions (No-Go major diameter) or tolerances applied to the dimensions.
The important lesson here is that all three gage options will functionally and accurately inspect the threaded hole for the helical insert or coil. It is questionable that an inspector, using the gages, is able to feel the difference between a .0001” Class W and .0003” Class X tolerance, as shown in our 20 TPI examples. The No-Go gage major in all three cases is smaller than the Go major. The No-Go major diameter will never touch the product thread major diameter, if the Go gage fits.
The easy way to avoid all of these potential issues is to state the standard specified by the industry you serve or the screw thread insert manufacturer you are using. Both the metrology lab and the gage manufacturer are required to follow the customer specified industry standards. Stating the standard when ordering or sending the gages for calibration eliminates the chance that the lab and manufacturer will disagree based on differing standards. Q
Looking for a reprint of this article?
From high-res PDFs to custom plaques, order your copy today!


