Web Exclusive
Recommended Compression and Tension Adapters for Force Calibration

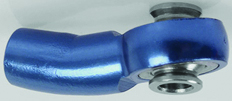
Figure 1: Bent Rod End
Not using the proper adapters to calibrate load cells, truck and aircraft scales, tension links, dynamometers, and other force measuring devices can produce significant measurement errors and pose serious safety concerns. There are a number of potential hazards associated with using older adapters, and worse still, the wrong adapters. It is vitally important to identify the adapters that will give a calibration technician the highest probability of meeting both manufacturer and customer requested specifications.
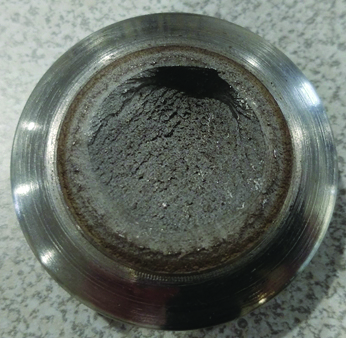
Figure 2: Grade 8 bolt that failed at 120,000 lbf and close to 350,000 load cycles
Frankly, it is very easy to keep using old adapters that have been in use for decades. However, this may result in safety issues as the service life for force calibration adapters depend on several factors including material, design, manufacturing, number of load cycles, and magnitude of each load. There may come a time where the material begins to lose strength as the result of fatigue and eventually breaks. When these adapters break, the technician may be put in harm’s way and you do not get a redo after something has failed. Today, there are better material and manufacturing control processes in place that provide more reliable strength values for design engineers than decades ago. There are also computer programs that greatly help in modeling and conducting all kinds of stress analysis. What should you do with older adapters? At a minimum you should visually inspect all adapters for any signs of wear or fatigue and replace if they show any signs of potential failure. It is important to replace any adapters that have been in use for more than 20 years or 100,000 load cycles (10,000 calibrations). Adapters today are designed for a life cycle of at least 500,000 load cycles (50,000 calibrations) and failure at close to 1,000,000 load cycles. Using the proper adapters is just going to yield better results.
Common Adapters to Reduce Force Measurement Error
Keeping the line of force pure (free from eccentric forces) is key to the calibration of load cells. ASTME74-18 in note 5 states “Force-measuring instruments have sensitivity in varying degrees depending on design to mounting conditions and parasitic forces and moments due to misalignment. A measure of this sensitivity may be made by imposing conditions to simulate these factors such as using fixtures with contact surfaces that are slightly convex or concave, or of varying stiffness or hardness, or with angular or eccentric misalignment, and so forth. Such factors can sometimes be significant contributors to measurement uncertainty and should be reflected in comprehensive measurement uncertainty analyses.” ISO 376 has an entire Annex devoted to adapters.
Typical tension member assemblies
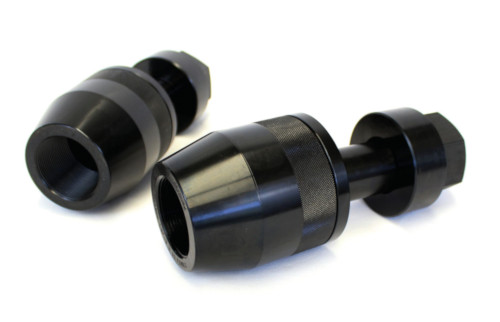
Figure 3: Typical tension members. Tensile force transducers should be fitted with two ball nuts, two ball cups.
A good start to what makes a good tension or compression adapter is the ISO 376 standard. Annex A.4.1 of the ISO 376 standard says “Loading fittings should be designed in such a way that the line of force application is not distorted. As a rule, tensile force transducers should be fitted with two ball nuts, two ball cups, and, if necessary, with two intermediate rings, while compressive force transducers should be fitted with one or two compression pads.” Figure 3 above shows typical tension adapters that have two ball nuts and two ball cups built into them to align the load cell with loading line and eliminate misalignment errors in tension calibration.
ISO 376 compliant compression adapters
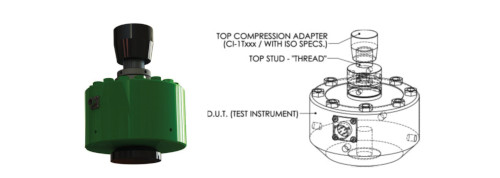
Figure 4: ISO 376 compliant compression adapters.
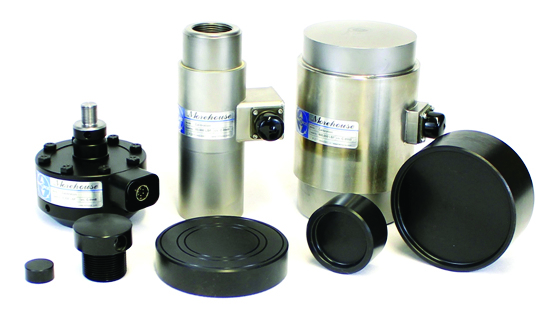
Figure 5: 200 lbf through 600,000 lbf concrete set with top and bottom adapters.
ISO 376 gives further guidance on baseplates and other adapters. In practice, a flat bottom plate may be needed to improve performance. It is often not recommended to load against the machine surface as it could be uneven, or the base of the load cell could deform the machine surface. For compression adapter, ISO 376 generally requires adapters that bring the contact pressure between load measuring device and machine under calibration to lower than 100 N/mm2. In addition, the hardness of the top adapter used during calibration may change the way the force is distributed through the load cell resulting in errors of as high as 0.5 % of applied force. Material having different hardnesses experiences different amounts of lateral deflection under the same amount of load. The hardness difference causes different amounts of stress between the block and load cell. Flatness and smoothness of the block is important in that it will change the contact position on the load cell. The assumption is the load cell has a radius (R17, for example) and is designed to be loaded exactly at the center of the spherical section, but an unbalanced or nonflat block can shift the contact point off center. In general, a small amount of shift in force application point will change the stress distribution. The key is to use the same adapters as used in calibration. The adapters should be manufactured not to produce off-axis loads. Load cells often have a steep radius that concentrates the force over a smaller area and may cause material to deform permanently. The deformation is why it is recommended having a compression top block mated to any load cell as shown in figure 5. For flat adapters, the two parallel surfaces must be ground to maximum parallelism. If you notice any damage or dents in compression pads, they should be reground and cleaned prior to calibration.
NOTE: Adapters for 600K load cell are not ISO compliant. They should weigh three times more to make them to ISO recommendations. These may need to custom produced; the purpose of the set is to minimize the physical weight.
Alignment plugs for better centering
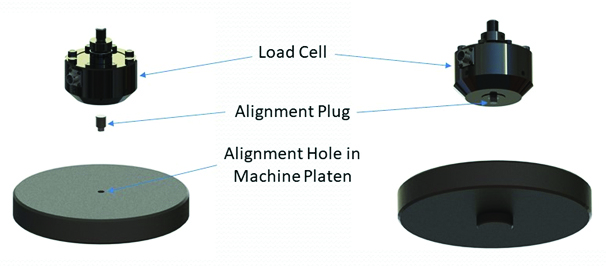
Figure 6: Alignment plugs.
Proper bottom alignment adapters help to align a load cell and other calibration fixtures to the load line of the calibrating machine. No matter how good an operator may be, human skill is not a substitute for something machined with precision. By having bottom adapters with concentric rings for alignment or alignment plugs to perfectly center the force-measuring instrument, the end user is going to be able to reduce misalignment error. Misalignment errors of up to 0.75 % on S-Beam load cells with less than 1/8” misalignment have been observed. Alignment plugs and base plates with alignment holes in figure 6 drastically reduce this error.
Common compression adapters for load cells

Figure 7: Top alignment adapters.
For the top of the load cells, it is recommended to load with either a spherical or ball adapter pictured in figure 7. In compression, using a ball adapter (pictured top right), if the machine has one, often yields the best results. If a ball adapter does not exist, a spherical alignment adapter (pictured top left) will help align the force. Use a spherical alignment adapter for any load cell that is not a shear web load cell with a female thread that needs to be calibrated in compression. For a shear web load cell, install the integral threaded adapter. The shear web load cell is very susceptible to varying thread engagement and the integral adapter eliminates this error. For those that still need to use a shear web type cell and have height restrictions, a spherical adapter is recommended, but will not produce results as good as an integral threaded adapter.
Common compression adapters for button and washer type cells
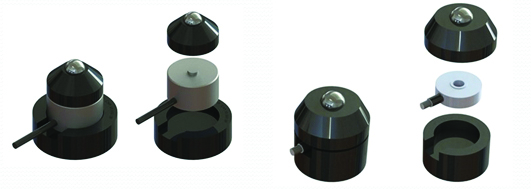
Figure 8: Button and washer load cell adapters.
The number one challenge with button and washer load cells is how to get them to repeat between rotations. These load cells are notoriously sensitive in rotation and any misalignment will produce large errors. Above are pictures of typical button and washer load cell adapters that improve alignment and yield better calibration results. Usually the results are better by a factor of five when using the above adapters, as compared with a technician trying to center as shown in figure 9 below. These adapter sets can also accommodate alignment plugs (Figure 6) to align the whole calibration setup with the calibration machine; a deadweight system, hydraulic Universal Calibrating Machines (UCM), or a Portable Calibrating Machine (PCM) offered by Morehouse.
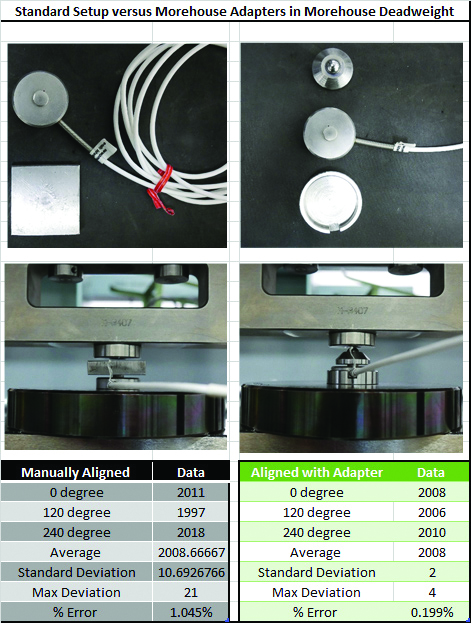
Figure 9: Typical button load cell calibration versus one with typical adapters.
Tension links also need attention, and the output is influenced by the size of the pin used during calibration. The recommended practice is to always calibrate the tension link with whatever the end user is using with it. Pins sold with the tension links are typically cast or forged and during use they develop uneven wear patterns. Marking the pins “top” and “bottom” is highly recommended as well as noting the orientation. In several cases the end user may send the link in for calibration without any adapters at all.
Tension clevis adapters for tension links, crane scales, and dynamometers
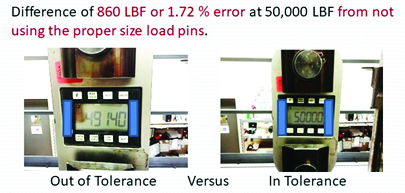
Figure 10: Tension link difference in output with pin size.
If the calibration lab then decides to use a pin that is different from manufacturer’s recommendations, there will be larger than expected bias. In Figure 10, a Tension link was loaded into a deadweight machine with accuracy of better than 0.002 % of applied force and loaded to 50,000 lbf with two different size load pins. When loaded with a smaller pin of 1.85 inches the device read 49,140 compared to being loaded with a 2-inch pin and reading 50,000 lbf. When the end user does not send in an adapter, the calibration laboratory is left with having to load the device with some pin.
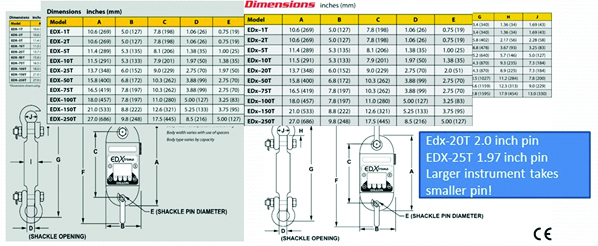
Figure 11: Manufacturer’s specification sheet for tension links.
Finding the right pin size can be tricky as shown in figure 11 as the manufacturer’s recommendations may be counter-intuitive. In the figure 11 example, a 20-ton tension link requires a 2.0-inch pin and a 25 ton requires a 1.97 (50mm) pin. If someone says 0.03 inches will not make a difference, then go ahead and test it. On a device with an accuracy specification of 0.1 % of full scale, our laboratory has seen a change of 0.03 inches use up 70 % of that specification.
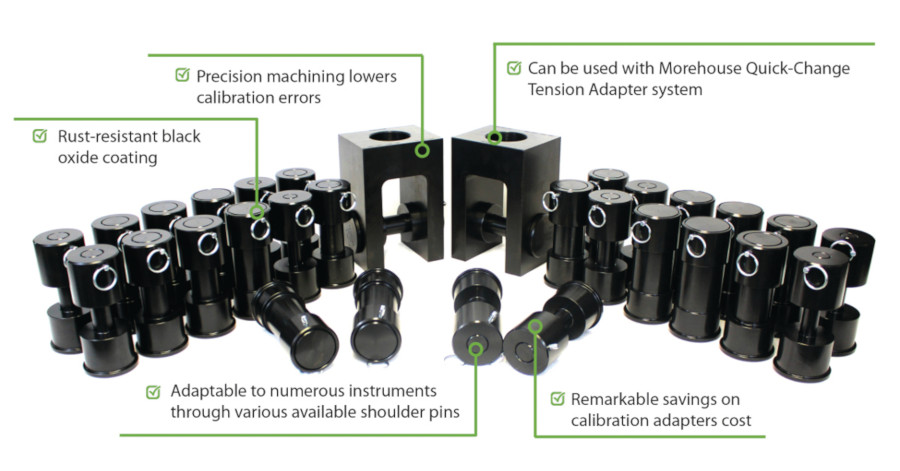
Figure 12: Clevis kits.
Recognizing these issues, Morehouse has designed clevis assemblies for use with its own Quick-Change Tension Adapters. These assemblies cross reference the manufacturer’s recommended pin size and allow the calibration laboratory to calibrate hundreds of tension links, crane scales, dynamometers, and rod-end load cells all using the same clevis. Not only does this simplify the logistics of having the proper adapter, but it also improves cycle time and standardizes the calibration process.
Figure 13 (PDF): Sample Morehouse adaptable clevis kits that can be used to calibrate.
Adapters for truck and aircraft scales
When someone calibrates a scale using weights or a hydraulic cylinder, are they simulating how the scale is used? Most truck and aircraft scales when in use have the truck or aircraft tire sitting directly on them. So how could it make sense to calibrate the scales without using an adapter that replicates actual use? Any adapter used during calibration should be composed of the same type of rubber and should have the same footprint as the tire to ensure accurate results. Adapters can be made for any scale that simulates the tire.
Adapters for hand held force gauges
Calibration technicians get tired of lifting weights to calibrate hand-held force gauges. Calibrating some hand-held force gauges is like playing a game of Jenga when a technician must stack weights in compression. What happens when those weights fall and shatter a toe? One solution is to use a portable calibrating machine with kits for hand-held force gauges. These kits can be used to calibrate several handheld force gauge models available on the market. For each model, a certain combination of a back-plate, bottom-plate, and threaded adapter must be assembled together.
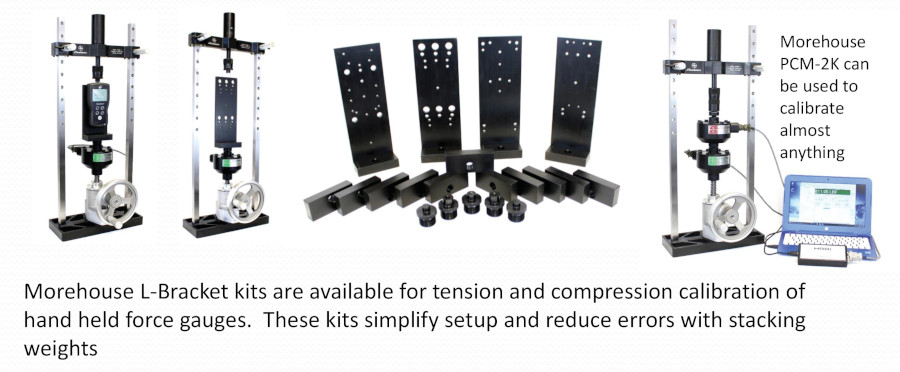
Figure 14: Portable calibrating machine with hand held force gauge adapters.
The 2,000 lbf capacity Morehouse PCM can handle any force instruments. The machine can use the washer and load button adapters for compression calibrations of those types of load cells, as well as common tension setups and hand held force gauges. The handheld force gauge kit simplifies the setup and allows the technician to calibrate these types of gauges in the same setup while keeping the line of force pure by using different offset plates included in the kits. These kits simplify setup, improve alignment, and drastically improve safety. The kits are also available for deadweight and Universal Calibrating Machines.
Miscellaneous adapter information
Adapters can be made for almost any force application from small (1 lbf) to large (2.5 million lbf). It is possible to design and manufacture adapters for calibrating various multi-axis load/torque cells, which will enable a laboratory to calibrate such cells in single axis calibrating machines.
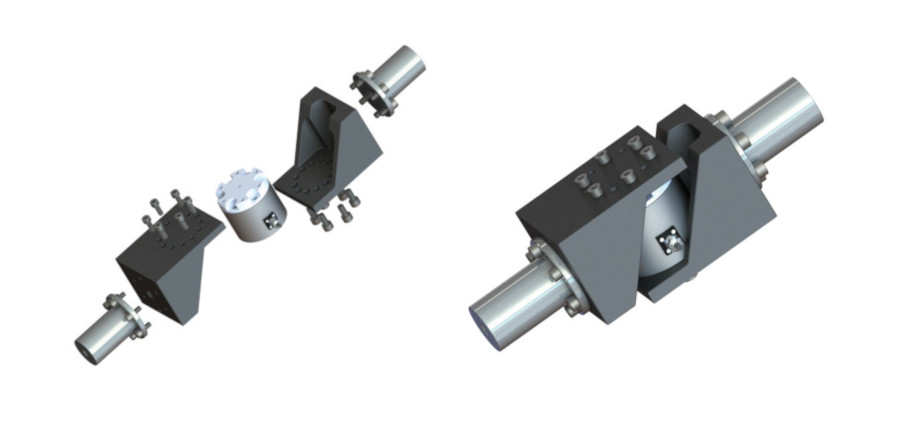
Figure 15: Calibration adapters for 6-axis force/torque cell.
Looking for a reprint of this article?
From high-res PDFs to custom plaques, order your copy today!


