Quality Magazine logo
search
cart
facebook twitter linkedin youtube
  • Sign In
  • Create Account
  • Sign Out
  • My Account
Quality Magazine logo
  • NEWS
  • PRODUCTS
    • SUBMIT YOUR PRODUCT
  • CHANNELS
    • AUTOMATION
    • MANAGEMENT
    • MEASUREMENT
    • NDT
    • QUALITY 101
    • SOFTWARE
    • TEST & INSPECTION
    • VISION & SENSORS
  • MARKETS
    • AEROSPACE
    • AUTOMOTIVE
    • ENERGY
    • GREEN MANUFACTURING
    • MEDICAL
  • MEDIA
    • A WORD ON QUALITY PUZZLE
    • EBOOK
    • PODCASTS
    • VIDEOS
    • WEBINARS
  • EVENTS
    • EVENT CALENDAR
    • QUALITY SHOW
    • IMTS
  • DIRECTORIES
    • BUYERS GUIDE
    • NDT SOURCEBOOK
    • VISION & SENSORS
    • TAKE A TOUR
  • INFOCENTERS
    • NEXT GENERATION SPC & QUALITY ANALYTICS
  • AWARDS
    • ROOKIE OF THE YEAR
    • PLANT OF THE YEAR
    • PROFESSIONAL OF THE YEAR
  • MORE
    • eNEWSLETTER
    • INDUSTRY LINKS
    • THE LEADERSHIP SURVEY
    • CLASSIFIEDS
    • MARKET RESEARCH
    • PRODUCT SPOTLIGHTS
    • QUALITY STORE
    • WHITE PAPERS
  • EMAG
    • eMAGAZINE
    • ARCHIVES
    • CONTACT
    • ADVERTISE
  • SIGN UP!
Home » Topics » Channels » Test & Inspection

Test & Inspection
Test & Inspection RSS Feed RSS

QM 0124 Test & Inspection Figure 1 feature image of Shmadzu DUH-211S Dynamic Ultra Micro Harness Tester
Test & Inspection

An Introduction to Dynamic Micro-indentation Measurements

This article will highlight the broad applicability of the dynamic hardness technique.
Christopher Macey
December 21, 2023

This article provides a brief introduction to a dynamic micro-indention measurement technique which can be useful to characterize materials that are hard to analyze using the well-known Vickers and Knoop measurements described in ASTM E364.


Read More
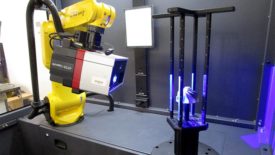
01 QM 1223 Case Study Automated Blue Light 3D-Scanner with Turbo Wheel
Case Study

Hitchiner Manufacturing Overcomes Casting Challenges with Automated Blue Light 3D Scanning Technology

By implementing automation, Hitchiner increased repeatability and speed.
Emily Starinieri
November 30, 2023

After integrating ATOS technology into its FAIR procedure, the metrology department experienced increasing internal inspection demand.


Read More
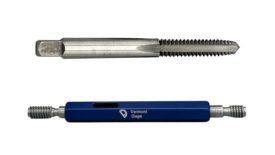
QM 1223 FEAT Test Tap Horizontal
Test & Inspection

How Do Tap Limits Affect Gage Selection?

It is not always as simple as it sounds.
Mike Oddy
November 2, 2023

One of the more frequent questions we receive is: I am tapping a ¼-20 UNC 2B internal thread with an “H13” tap, what gage do I need to inspect the threaded holes in my parts after tapping?


Read More
QM 1123 FEAT Test and Inspection Materials and products VectorPro OmniTest
Test & Inspection

What Product Quality Testing is Made of

Quality materials are the route to quality products.
Carl Bramley
October 19, 2023

Quality materials are the route to quality products. For a product to be fit-for-purpose and meet legislative and commercial requirements it must check several boxes.


Read More
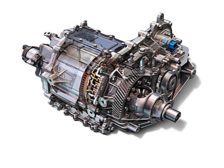
QM 1023 Test and Inspection B EV Powertrain webinar Digital Twin model overview 1170x878
Test & Inspection

e-Powertrain Electric Motor Gear Train Simulated Testing with the Digital Twin

By replacing the initial tests with digital twin simulations, results can be obtained quickly, and at a much lower cost.
Thomas Oetjens
September 18, 2023

A digital validation of the design variation to reduce prototype builds or solve build issues while increasing innovation.


Read More
QM 1023 Test and Inspection A feature
Test & Inspection

In-situ Monitoring for Additive Manufacturing: Opportunities and Challenges

As parts become more complex and are used in more critical applications, the need for in-situ monitoring grows.
Clare Scott
September 18, 2023

In-situ monitoring (ISM) has plenty of room for growth and maturation, and thus in June 2022, ASTM International and NASA sponsored an ISM workshop.


Read More
QM 0923 Test and Inspection ATOS 5X Digitizing Blade 3
Test & Inspection

Advanced 3D Scanning Digitalization Technologies for NDT of Industrial Gas Turbine Components

Advanced 3D metrology software capabilities offer reliable and more efficient solutions to the limitations of conventional nondestructive methods.
Emily Starinieri
August 23, 2023

Advanced 3D digitalization technologies offer a solution with a modernized NDT alternative that saves time and money and unlocks access to more information in a single measurement session.


Read More
01 QM 0823 Test and Inspection B Strain Gauge
Test & Inspection

Important Considerations for Tensile Testing Equipment in Aerospace Applications

The most powerful tool a company has is the ability to follow a component failure back to the batch of material it was made from.
Casey Willis
August 3, 2023

Whether you are an OEM testing an airframe or a third tier supplier testing high strength alloys, it is crucial to use a reliable tensile testing system that can produce repeatable results.


Read More
01 QM 0823 Test and Inspection Large scale tensile test software control Mecmesin

Tensile Testing: A Gripping Story

Tensile testing is varied in purpose and industry specific. The manner of holding the test specimen and applying the axis of tensile force is what makes the application unique and enables quality assurance at almost any point in any product's lifecycle.
Moses Da Rocha
July 28, 2023

Two basic types of tensile test are broadly relevant; is the test specimen strong enough to resist breakage, or is it easy to use safely and efficiently?


Read More
QM 0723 Test & Inspection A Low Volume Failure

EV Battery Manufacturing: Steps to Assure Joining Quality and Eliminate Harmful Leaks

The importance of reliability in EV batteries is paramount to the overall vehicle performance.
Jürgen Dennig
July 13, 2023

Battery manufacturing quality in the automotive industry is becoming increasingly important with the growing popularity of electric and hybrid-electric vehicles.


Read More
Previous 1 2 3 4 5 6 7 8 9 10 11 … 85 86 Next
Subscribe For Free!
  • eMagazine Subscriptions
  • eNewsletters
  • Online Registration
  • Subscription Customer Service
  • Manage My Preferences

More Videos

Popular Stories

Technician working with the Vision Engineering LVC200.

Difference Between Calibration and Verification

Woman working in quality control, measuring a workpiece.

AI’s Double-Edged Sword: Security and Compliance in Manufacturing

QM0525-FEAT-A3-Automation-p1FT-Quality-Inspection.jpg

The Next Frontier of Automation: Quality Assurance in an AI-Driven Era

May 21 Quality Hexagon Live Webinar

Events

May 21, 2025

The Evolution of Laser Radar: Measuring Large Scale From Distance With High Accuracy

This webinar, featuring a live demonstration, will showcase the evolution of Hexagon’s direct scanning laser trackers: cutting-edge technology that now delivers traditional reflector-tracking accuracy to non-contact, large-part scanning.

View All Submit An Event

Products

Lean Manufacturing and Service Fundamentals, Applications, and Case Studies

Lean Manufacturing and Service Fundamentals, Applications, and Case Studies

See More Products
Play Quality's captivating word-guessing game! There's a new word every Friday.

Stay in the know with Quality’s comprehensive coverage of
the manufacturing and metrology industries.

eNewsletter | Website | eMagazine

JOIN TODAY!
  • RESOURCES
    • Advertise
    • Contact Us
    • Directories
    • Store
    • Want More
  • SIGN UP TODAY
    • Create Account
    • eMagazine
    • eNewsletter
    • Customer Service
    • Manage Preferences
  • SERVICES
    • Marketing Services
    • Market Research
    • Reprints
    • List Rental
    • Survey/Respondent Access
  • STAY CONNECTED
    • LinkedIn
    • Facebook
    • YouTube
    • X (Twitter)
  • PRIVACY
    • PRIVACY POLICY
    • TERMS & CONDITIONS
    • DO NOT SELL MY PERSONAL INFORMATION
    • PRIVACY REQUEST
    • ACCESSIBILITY

Copyright ©2025. All Rights Reserved BNP Media.

Design, CMS, Hosting & Web Development :: ePublishing