Quality Magazine logo
search
cart
facebook twitter linkedin youtube
  • Sign In
  • Create Account
  • Sign Out
  • My Account
Quality Magazine logo
  • NEWS
  • PRODUCTS
    • SUBMIT YOUR PRODUCT
  • CHANNELS
    • AUTOMATION
    • MANAGEMENT
    • MEASUREMENT
    • NDT
    • QUALITY 101
    • SOFTWARE
    • TEST & INSPECTION
    • VISION & SENSORS
  • MARKETS
    • AEROSPACE
    • AUTOMOTIVE
    • ENERGY
    • GREEN MANUFACTURING
    • MEDICAL
  • MEDIA
    • A WORD ON QUALITY PUZZLE
    • EBOOK
    • PODCASTS
    • VIDEOS
    • WEBINARS
  • EVENTS
    • EVENT CALENDAR
    • QUALITY SHOW
    • IMTS
  • DIRECTORIES
    • BUYERS GUIDE
    • NDT SOURCEBOOK
    • VISION & SENSORS
    • TAKE A TOUR
  • INFOCENTERS
    • NEXT GENERATION SPC & QUALITY ANALYTICS
  • AWARDS
    • ROOKIE OF THE YEAR
    • PLANT OF THE YEAR
    • PROFESSIONAL OF THE YEAR
  • MORE
    • eNEWSLETTER
    • INDUSTRY LINKS
    • THE LEADERSHIP SURVEY
    • CLASSIFIEDS
    • MARKET RESEARCH
    • PRODUCT SPOTLIGHTS
    • QUALITY STORE
    • WHITE PAPERS
  • EMAG
    • eMAGAZINE
    • ARCHIVES
    • CONTACT
    • ADVERTISE
  • SIGN UP!
Home » Authors » Patrick Nugent

Patrick Nugent

Pat Nugent is the vice president, product management, at Mahr. For more information, call (401) 784-3392, email [email protected] or visit www.mahr.com.

Articles

ARTICLES

QM 1222 Measurement MarSurf Engineered Series 002

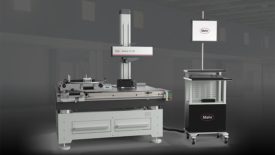
Automation Makes Surface Measurement More Reliable in a Production Environment

Automation has numerous benefits for surface finish measurement.
Nick Russo Patrick Nugent
December 14, 2022

As surface finish measurement increasingly moves to the point of manufacture, adding automation to the process helps maximize productivity and increases quality and machining efficiency.


Read More
QM 0622Test & Inspection Mahr Product Caption
Test & Inspection

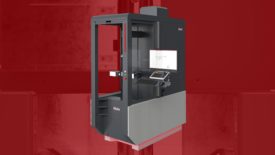
Is it Possible to Measure Shaft, Form and Gear with an All-In-One Machine?

Do more with less — minimizing downtime for production workpiece measurements.
Patrick Nugent
May 30, 2022

Here’s a thought: what if you could also perform multiple measuring tasks at the same time, on the same part with one machine, right there on the factory floor?


Read More
QM 1221 Test & Inspection: MMQ-400 2804 Clip color
Test & Inspection

Not All Calibrations are Created Equal

Why ensuring quality calibration of your precision measurement equipment is critical.
Patrick Nugent
December 6, 2021

The art of precision measurement is essentially all about the data that is obtained in the process and the value that it brings to a manufacturing operation. It is about making decisions based on high quality data.


Read More
Quality 101 Scope 750 feature image
Quality 101

How to Choose the Best Shaft Measurement Tool for your Specific Application

There are Three Primary Options Available Today for Shaft Measurement: Optical, Tactile, and a Combination System
Patrick Nugent
June 7, 2021
There are three primary options available today for shaft measurement: optical, tactile, and a combination system. The optical systems have become common over the past few decades because of their flexibility and speed. So how do you choose the best option for your specific application?
Read More
Measurement of a shaft

Shaft Measurement: What is the Best Tool for the Job?

Shaft measurement can be performed with a variety of metrology tools, from handheld devices to high-end coordinate measuring machines.
Patrick Nugent
November 1, 2019

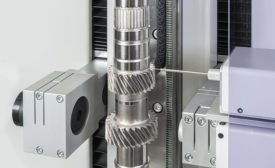
The simple shaft is one of the ubiquitous items in every mechanical system. Shafts contain a number of key functional elements, such as splines, tapers, grooves, threads, cams and gears, which all have associated critical dimensions to allow these mechanical systems to perform the function for which they were designed.


Read More
measurement

Form Measurement: Back to Basics

Understanding common problems in the measurement of form.
Patrick Nugent
September 1, 2018

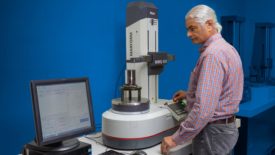
Form is a relatively easy thing to measure in many senses. In the simplest manner, form measurement involves a probe or stylus being moved along an ideal circular or linear path to gather data on the probe movements relative to that ideal geometry.


Read More
QM1017-DEPT-Quality_101-p1FT-Multiple_level.jpg

Form Measurement: Making it Easy

Understanding these issues may help you advance your process, or at least, make things less difficult.
Patrick Nugent
October 17, 2017

A friend of mine likes to quip that someday computers will make all our lives easier. He’s kidding (I think), but it seems to be a fact of modern life that every time we open our phones, tablets, or computers, or even check our watches, there are upgrades waiting to be installed for the apps we have, and new and improved apps on offer to replace those.


Read More
calibration

Calibration: What You Need to Know

Calibration, certification and accreditation are terms that are sometimes used interchangeably, but they are actually not the same.
Patrick Nugent
George Schuetz
George Schuetz
November 1, 2016

Calibration is not just about having stickers on your equipment with dates that say everything is okay.


Read More
Skimming the Surface of Surface Finish
Measurement

Skimming the Surface of Surface Finish

Patrick Nugent
July 1, 2016

The problem with surface finish is that it gets deep very quickly. Many people talk about the “finish” or the “roughness” of a surface as if it were one unique thing. 


Read More
Form Measure

The Next Quantum Leap in Form Measurement

Industry is rapidly shifting towards micron level tolerance requirements.
Patrick Nugent
March 1, 2016

We usually think of a “quantum leap” as a big thing, a great change or advance, and often when we are using this term, it is. Yet the term actually originates from atomic science and describes an electron moving from one energy level to another.


Read More
View All Articles by Patrick Nugent
Subscribe For Free!
  • eMagazine Subscriptions
  • eNewsletters
  • Online Registration
  • Subscription Customer Service
  • Manage My Preferences

More Videos

Popular Stories

Technician working with the Vision Engineering LVC200.

Difference Between Calibration and Verification

Woman working in quality control, measuring a workpiece.

AI’s Double-Edged Sword: Security and Compliance in Manufacturing

QM0525-FEAT-A3-Automation-p1FT-Quality-Inspection.jpg

The Next Frontier of Automation: Quality Assurance in an AI-Driven Era

May 21 Quality Hexagon Live Webinar

Events

May 21, 2025

The Evolution of Laser Radar: Measuring Large Scale From Distance With High Accuracy

This webinar, featuring a live demonstration, will showcase the evolution of Hexagon’s direct scanning laser trackers: cutting-edge technology that now delivers traditional reflector-tracking accuracy to non-contact, large-part scanning.

View All Submit An Event

Products

Lean Manufacturing and Service Fundamentals, Applications, and Case Studies

Lean Manufacturing and Service Fundamentals, Applications, and Case Studies

See More Products
Play Quality's captivating word-guessing game! There's a new word every Friday.

Stay in the know with Quality’s comprehensive coverage of
the manufacturing and metrology industries.

eNewsletter | Website | eMagazine

JOIN TODAY!
  • RESOURCES
    • Advertise
    • Contact Us
    • Directories
    • Store
    • Want More
  • SIGN UP TODAY
    • Create Account
    • eMagazine
    • eNewsletter
    • Customer Service
    • Manage Preferences
  • SERVICES
    • Marketing Services
    • Market Research
    • Reprints
    • List Rental
    • Survey/Respondent Access
  • STAY CONNECTED
    • LinkedIn
    • Facebook
    • YouTube
    • X (Twitter)
  • PRIVACY
    • PRIVACY POLICY
    • TERMS & CONDITIONS
    • DO NOT SELL MY PERSONAL INFORMATION
    • PRIVACY REQUEST
    • ACCESSIBILITY

Copyright ©2025. All Rights Reserved BNP Media.

Design, CMS, Hosting & Web Development :: ePublishing